概要
UnityでAndroidのネイティブな音声認識機能を利用したかったのでプラグインから作成してみました。
今回は作成方法などのまとめです。
なお、ネイティブプラグイン自体の作成方法については以前書いたのでそちらを参照ください。
今回実装したものを実際に動かした動画です↓
Androidで音声認識するネイティブプラグイン、Unityで無事に動いたー pic.twitter.com/L2mDfskyFB
— edom18@XR / MESON CTO (@edo_m18) 2018年3月21日
音声認識する部分の処理を書く
さて、さっそくプラグイン部分のコードを。
プラグイン自体の作成方法は前回の記事を見ていただくとして、今回はプラグイン部分のみを抜き出しています。
プラグイン用のプロジェクトを作成したら、以下のように音声認識エンジンを起動するクラスを実装します。
package com.edo.speechplugin.recoginizer;

import android.content.Context;
import android.os.Bundle;
import android.speech.RecognitionListener;
import android.speech.RecognizerIntent;
import android.speech.SpeechRecognizer;
import android.content.Intent;

import static com.unity3d.player.UnityPlayer.UnitySendMessage;

public class NativeSpeechRecognizer
{
    static public void StartRecognizer(Context context, final String callbackTarget, final String callbackMethod)
    {
        Intent intent = new Intent(RecognizerIntent.ACTION_RECOGNIZE_SPEECH);
        intent.putExtra(RecognizerIntent.EXTRA_LANGUAGE_MODEL, RecognizerIntent.LANGUAGE_MODEL_FREE_FORM);
        intent.putExtra(RecognizerIntent.EXTRA_CALLING_PACKAGE, context.getPackageName());

        SpeechRecognizer recognizer = SpeechRecognizer.createSpeechRecognizer(context);
        recognizer.setRecognitionListener(new RecognitionListener()
        {
            @Override
            public void onReadyForSpeech(Bundle params)
            {
                // On Ready for speech.
                UnitySendMessage(callbackTarget, callbackMethod, "onReadyForSpeech");
            }

            @Override
            public void onBeginningOfSpeech()
            {
                // On begining of speech.
                UnitySendMessage(callbackTarget, callbackMethod, "OnBeginningOfSpheech");
            }

            @Override
            public void onRmsChanged(float rmsdB)
            {
                // On Rms changed.
                UnitySendMessage(callbackTarget, callbackMethod, "onRmsChanged");
            }

            @Override
            public void onBufferReceived(byte[] buffer)
            {
                // On buffer received.
                UnitySendMessage(callbackTarget, callbackMethod, "onBufferReceived");
            }

            @Override
            public void onEndOfSpeech()
            {
                // On end of speech.
                UnitySendMessage(callbackTarget, callbackMethod, "onEndOfSpeech");
            }

            @Override
            public void onError(int error)
            {
                // On error.
                UnitySendMessage(callbackTarget, callbackMethod, "onError");
            }

            @Override
            public void onResults(Bundle results)
            {
                // On results.
                UnitySendMessage(callbackTarget, callbackMethod, "onResults");
            }

            @Override
            public void onPartialResults(Bundle partialResults)
            {
                // On partial results.
                UnitySendMessage(callbackTarget, callbackMethod, "onPartialResults");
            }

            @Override
            public void onEvent(int eventType, Bundle params)
            {
                // On event.
                UnitySendMessage(callbackTarget, callbackMethod, "onEvent");
            }
        });

        recognizer.startListening(intent);
    }
}
上記はリスナーの登録の雛形です。
Unityの機能であるUnitySendMessageを使っていますが詳細は後述します。
SpeechRecognizer#setRecognitionListenerでリスナを登録し、SpeechRecognizer#startListeningで音声認識エンジンを起動します。
認識した文字列を受け取る
認識した文字列を受け取る箇所については認識した際のコールバックで文字列を取り出します。
@Override
public void onResults(Bundle results)
{
    ArrayList<String> list = results.getStringArrayList(SpeechRecognizer.RESULTS_RECOGNITION);
    String str = "";
    for (String s : list)
    {
        if (str.length() > 0)
        {
            str += "\n";
        }
        str += s;
    }

    UnitySendMessage(callbackTarget, callbackMethod, "onResults\n" + str);
}
基本的にプラグインとの値の受け渡しは文字列で行うのが通常のようです。
あとはUnity側で文字列を受け取り、適切に分解して利用することで無事、Unity上で音声認識を利用することができるようになります。
Unityの機能を利用できるようにclasses.jarをimportする
音声認識したあと、それをコールバックするためUnity側にメッセージを送信する必要があります。
その際、Unity側の実装を呼び出す必要があるため、それを利用するためにclasses.jarをimportしておく必要があります。
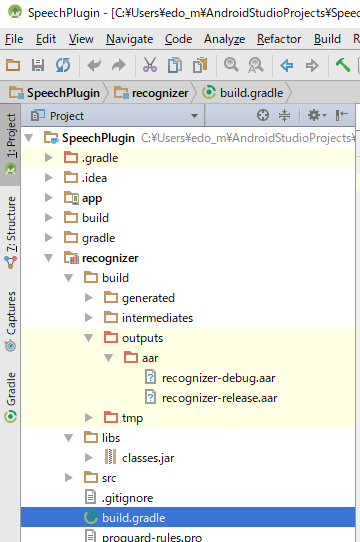
import先はモジュールのlibsフォルダ内です。

なお、該当のファイルは以下の場所にあります。(環境によってパスは読み替えてください)
D:\Program Files\Unity2017.3.1p4\Editor\Data\PlaybackEngines\AndroidPlayer\Variations\mono\Release\Classes\classes.jar
Gradle設定にclasses.jarを含めないよう追記する
classes.jarは、UnitySendMessageを使うのに必要ですが、aarに含まれてしまうとUnityでのビルド時にエラーが出てしまうため、aarに含めないよう設定ファイルに記述する必要があります。
以下を、モジュール用のbuild.gradleに追記します。
android.libraryVariants.all{ variant->
  variant.outputs.each{output->
    output.packageLibrary.exclude('libs/classes.jar')
  }
}
全体としては以下のようになります。
plugins {
    id 'com.android.library'
}

android {
    namespace 'com.edo.speechrecognizer'
    compileSdk 32

    defaultConfig {
        minSdk 23
        targetSdk 32

        testInstrumentationRunner "androidx.test.runner.AndroidJUnitRunner"
        consumerProguardFiles "consumer-rules.pro"
    }

    buildTypes {
        release {
            minifyEnabled false
            proguardFiles getDefaultProguardFile('proguard-android-optimize.txt'), 'proguard-rules.pro'
        }
    }
    compileOptions {
        sourceCompatibility JavaVersion.VERSION_1_8
        targetCompatibility JavaVersion.VERSION_1_8
    }

}

android.libraryVariants.all{ variant->
    variant.outputs.each{output->
        output.packageLibrary.exclude('libs/classes.jar')
    }
}

dependencies {

    implementation 'androidx.appcompat:appcompat:1.5.1'
    implementation 'com.google.android.material:material:1.7.0'
    implementation fileTree(dir: 'libs', include: ['*.aar', '*.jar'], exclude: [])
    testImplementation 'junit:junit:4.13.2'
    androidTestImplementation 'androidx.test.ext:junit:1.1.3'
    androidTestImplementation 'androidx.test.espresso:espresso-core:3.4.0'
}
設定ファイルはこれです。

ちなみに設定しないと、
com.android.build.api.transform.TrasnformException: com.android.idle.common.process.ProcessException: java.util.concurrent.ExecutionException: com.android.dex.DexException: Multiple dex files define Lbitter/jnibridge/JNIBridge$a;
みたいなエラーが出ます。
[2023.03.04 追記]
どうやら上の記述だとビルド時に含まれてしまうようになったっぽいです。
ので、依存関係の解決を以下のように変更します。( compileOnly に変更する)
- implementation fileTree(dir: 'libs', include: ['*.aar', '*.jar'], exclude: [])
+ compileOnly fileTree(dir: 'libs', include: ['*.aar', '*.jar'], exclude: [])
AndroidManifestに録音権限を追記する
当然ですが、音声認識を利用するためにはマイクからの音を利用する必要があるため、AndroidManifestに下記の権限を追記する必要があります。
<uses-permission android:name="android.permission.RECORD_AUDIO" />
Unity側から呼び出す処理を実装する
プラグインが作成できたらそれを利用するためのC#側の実装を行います。
以下のようにしてプラグイン側の処理を呼び出します。
using System.Collections;
using System.Collections.Generic;
using UnityEngine;
using UnityEngine.UI;

public class AndroidSpeechRecognizer : MonoBehaviour
{
    [SerializeField]
    private Text _text;

    private void Update()
    {
        if (Input.touchCount > 0)
        {
            Touch touch = Input.touches[0];
            if (touch.phase == TouchPhase.Began)
            {
                StartRecognizer();
            }
        }
    }

    private void StartRecognizer()
    {
#if UNITY_ANDROID
        AndroidJavaClass nativeRecognizer = new AndroidJavaClass("com.edo.speechplugin.recoginizer.NativeSpeechRecognizer");
        AndroidJavaClass unityPlayer = new AndroidJavaClass("com.unity3d.player.UnityPlayer");
        AndroidJavaObject context = unityPlayer.GetStatic<AndroidJavaObject>("currentActivity");

        context.Call("runOnUiThread", new AndroidJavaRunnable(() =>
        {
            nativeRecognizer.CallStatic(
                "StartRecognizer",
                context,
                gameObject.name,
                "CallbackMethod"
            );
        }));
#endif
    }

    private void CallbackMethod(string message)
    {
        string[] messages = message.Split('\n');
        if (messages[0] == "onResults")
        {
            string msg = "";
            for (int i = 1; i < messages.Length; i++)
            {
                msg += messages[i] + "\n";
            }

            _text.text = msg;
            Debug.Log(msg);
        }
        else
        {
            Debug.Log(message);
        }
    }
}
ネイティブプラグイン側で音声認識の結果をUnitySendMessageによってコールバックするようになっているので、それを受け取るコールバック用メソッドを実装しています。
プラグイン側では文字列でメソッド名を指定してコールバックを実行するので、プラグイン側にメソッド名を適切に渡す必要があります。
あとは認識した文字列を元に、行いたい処理を実装すれば音声認識を利用したアプリを制作することができます。
トラブルシューティング
もし、プラグインは実行できるのにすぐにエラーで停止してしまう場合は、マイクの権限が付与されていない可能性があるのでアプリの設定を見直してみてください。
参考記事
今回のプラグイン作成には以下の記事を参考にさせていただきました。