概要
プロジェクトでポストイットを判別したいという話があり、それを実現するためにOpenCVに手を出してみました。使う上での備忘録をメモしていきます。
なお、今回紹介する内容はおもちゃラボさんの以下の記事を、OpenCV for Unityに置き換えて実装しなおしたものになります。その過程でいくつかの違いがあったのでそれを主にメモしています。
今回記載した内容はGitHubにアップしてあります。(ただしOpenCV for Unityは当然含まれていないので、実際に動かす場合はご自身でご購入ください)
- 概要
- OpenCV for Unityとは
- 単語・機能
- 画像(Texture2D)をMatに変換する
- Matを画像(Texture2D)に変換する
- WebCamTextureをMatに変換する
- 画像をグレースケール化する
- 画像を2値化する
- ガウシアンブラーをかける
- Sobelフィルターを適用する
- マスクを作る
- 射影変換
- カラー画像からチャンネルごとの要素を取得する
- 輪郭検出
- 輪郭の近似
- 輪郭検出したエリアをくり抜く
- 参考にした記事
OpenCV for Unityとは
OpenCV for Unityは、OpenCVをUnity上で扱えるようにしてくれるアセットです。iOSやAndroidもサポートされており、とても幅広く使えるアセットになっています。ただしアセットストアで販売されていて $104.50 とやや高めです。
単語・機能
OpenCV for Unityを利用する上で最初に知っておいたほうがいい知識を簡単にまとめておきます。(あくまで今回のサンプルを実装する上での内容です)
CvType
CV_8UC1 などと定義されている enum の値。
OpenCVで利用する行列の種類を示すもの。頻繁に登場するのでどんな値があるのか以下の記事を参考に把握しておくといいでしょう。
ちなみに値の意味は以下だと思われます。(詳細は上記記事を参照)
CV_{ビット数}{符号有無 (U|S|F)}C{チャンネル数}
Matクラス
画像を取り扱うメインとなるクラス。 Matrix の略で、画像を2次元配列として行列で表したもの。rows、 cols があり、ピクセルを行列で扱うための機能が提供されている。基本はこれを利用しながら画像を処理していく。
なお、実装はネイティブでされており、必要なくなったら自分で破棄する必要がある点に注意です。
OpenCVForUnity.UnityUtils
Unityのテクスチャを Mat 型に変換したり、あるいはその逆をしてくたりといったユーティリティを提供してくれます。
OpenCVForUnity.ImgprocModule
この名前空間に所属する Imgproc クラスが、基本的なOpenCVの処理を実現してくれるメソッドを提供してくれます。例えば Imgproc.cvtColor(mat, gray, Imgproc.COLOR_RGBA2GRAY); で画像をグレースケール化したりします。
2x2行列を作る
冒頭の Mat のところでも書きましたが、 CvType を利用して好きな数の行列を作成することが出来ます。OpenCVを利用する上で知っておくと便利だと思ったのでメモしておきます。
Mat mat = new Mat(2, 2, CvType.CV_8UC1);
mat.put(0, 0, 1, 2, 3, 4);

Debug.Log(test.dump());
Debug.Log(test.row(0).dump());
以下からは、冒頭のおもちゃラボさんの記事を参考に、様々なOpenCVの処理を実現していくコード断片を載せていきます。基本的に逆引き的な感じで書いています。
画像(Texture2D)をMatに変換する
まずは、なにはなくともテクスチャの情報を Mat に変換する必要があります。ということで変換処理。 OpenCVForUnity.UnityUtils を利用します。
using OpenCVForUnity.CoreModule;
using OpenCVForUnity.UnityUtils;

// テクスチャをMat化
Mat mat = new Mat(texture.height, texture.width, CvType.CV_8UC4); // 8bit Unsigned 4 channels.
Utils.texture2DToMat(texture, mat);
冒頭でも書いた通り CvType.CV_8UC4(CvType)がありますね。これは符号なし8bitが4チャンネル、つまりRGBA分ある行列を生成する、という意味になります。
なお注意点として、 Mat 型の生成は width と height が、 Texture2D を生成するときと引数の順番が異なるので気をつけてください。
Matを画像(Texture2D)に変換する
上記の逆バージョン。こちらも OpenCVForUnity.UnityUtils を利用します。 Mat には cols() や rows() があり、行列のサイズを取得できるのでこれを利用してテクスチャを生成しています。
using OpenCVForUnity.UnityUtils;

Texture2D texture = new Texture2D(mat.cols(), mat.rows(), TextureFormat.RGBA32, false);
Utils.matToTexture2D(mat, texture);
WebCamTextureをMatに変換する
OpenCVを利用する上で、WebCamからの映像に効果を付け加えるというのはポピュラーな方法でしょう。OpenCV for Unityには WebCamTexture から Mat 型に変換するためのユーティリティも備わっています。
using OpenCVForUnity.UnityUtils;
using OpenCVForUnity.ImgprocModule;

private WebCamTexture _webCamTexture;
private Color32[] _colors;
private Mat _rgbaMat;
private int _textureWidth;
private int _textureHeight;

// 各種インスタンス生成
_webCamTexuture = ...; // WebCamTextureの取得作法に則る
_rgbaMat = new Mat(_textureHeight, _textureWidth, CvType.CV_8UC4, new Scalar(0, 0, 0, 255));
_colors = new Color32[_textureWidth * _textureHeight];

// 変換
Utils.webCamTextureToMat(_webCamTexture, _rgbaMat, _colors);
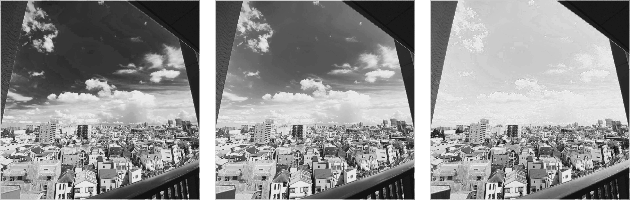
画像をグレースケール化する
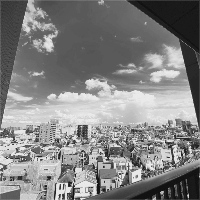
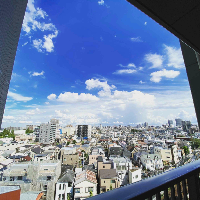
いよいよここからOpenCVらしさが出てきます。生成した Mat を利用して様々な処理を施していきます。ここではグレースケール化する手順を見てみましょう。
using OpenCVForUnity.CoreModule;
using OpenCVForUnity.UnityUtils;
using OpenCVForUnity.ImgprocModule;

// テクスチャをMat化
Mat mat = new Mat(texture.height, texture.width, CvType.CV_8UC4);
Utils.texture2DToMat(texture, mat);

// 画像をグレースケール化
Mat gray = new Mat(texture.height, texture.width, CvType.CV_8UC1);
Imgproc.cvtColor(mat, gray, Imgproc.COLOR_RGBA2GRAY);
OpenCVForUnity.ImgprocModule 名前空間にある Imgproc クラスのメソッドを利用します。ここでは cvtColor (Convert Colorの略だと思う)を使っています。
変換結果は第2引数に渡した Mat 型のインスタンスに格納されるので、事前に生成してメソッドに渡します。よく見ると CvType.CV_8UC1 となっているのが分かります。これは、グレースケール化したあとはRGBAの4チャンネルではなく1チャンネルのみで表されるため、1チャンネル分の行列を確保している、ということになります。
画像を2値化する
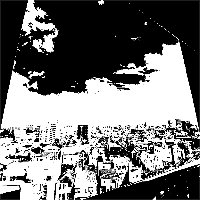
上記でグレースケール化した画像をさらに2値化してみます。基本的な手順はグレースケール化と同様です。
using OpenCVForUnity.CoreModule;
using OpenCVForUnity.UnityUtils;
using OpenCVForUnity.ImgprocModule;

// テクスチャをMat化
Mat mat = new Mat(texture.height, texture.width, CvType.CV_8UC4);
Utils.texture2DToMat(texture, mat);

// 画像をグレースケール化
Mat gray = new Mat(texture.height, texture.width, CvType.CV_8UC1);
Imgproc.cvtColor(mat, gray, Imgproc.COLOR_RGBA2GRAY);

Mat bin = new Mat(texture.height, texture.width, CvType.CV_8UC1);
Imgproc.threshold(gray, bin, 127.0, 255.0, Imgproc.THRESH_BINARY);
ガウシアンブラーをかける
次は画像にブラーをかけます。ブラーをかけるには GaussianBlur メソッドを使います。第一、第二引数はグレースケールなどと同様です。第三引数はカーネルサイズです。第四、第五引数はぼかしの強さに影響を与えます。
いくつかのオーラーロードがあり、シンプルなメソッドシグネチャは以下になります。
static void GaussianBlur (Mat src, Mat dst, Size ksize, double sigmaX)
ガウシアンブラー自体についても過去に記事を書いているので興味があれば読んでみてください。
using OpenCVForUnity.CoreModule;
using OpenCVForUnity.UnityUtils;
using OpenCVForUnity.ImgprocModule;

// テクスチャをMat化
Mat mat = new Mat(texture.height, texture.width, CvType.CV_8UC4);
Utils.texture2DToMat(texture, mat);

Mat blur = new Mat();
Imgproc.GaussianBlur(mat, blur, new Size(11, 11), 0);
Sobelフィルターを適用する

Sobelフィルター。実行にはその名の通りな Soble を使います。画像テクセルの上下左右の値の差を利用して輪郭の検出を行うようなフィルターです。
using OpenCVForUnity.UnityUtils;
using OpenCVForUnity.ImgprocModule;

private Texture2D _texture;

Mat mat = new Mat(_texture.height, _texure.width, CvType.CV_8UC4);
Mat gray = new Mat(_texture.height, _texture.width, CvType.CV_8UC1);
Mat sobel = new Mat();
Utils.texture2DToMat(_texture, mat);

Imgproc.cvtColor(mat, gray, Imgproc.COLOR_RGBA2GRAY);
Imgproc.Sobel(gray, sobel, -1, 1, 0);
マスクを作る
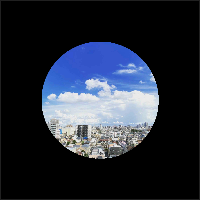
とあるエリアをくり抜いたり、といったマスク効果を実現します。
using OpenCVForUnity.CoreModule;
using OpenCVForUnity.UnityUtils;
using OpenCVForUnity.ImgprocModule;

private Texture2D _texture;

Mat mat = new Mat(_texture.height, _texture.width, CvType.CV_8UC4);
Utils.texture2DToMat(_texture, mat);

Mat maskMat = new Mat(_texture.height, _texture.width, CvType.CV_8UC4, new Scalar(0, 0, 0, 255));

// OpenCVの機能で円を描く
// 第3引数は半径、第5引数は線の太さ。-1を指定すると塗りつぶし
Imgproc.circle(maskMat, new Point(mat.width() / 2, mat.height() / 2), 300, new Scalar(255, 255, 255, 255), -1);

Mat dst = new Mat();
Core.bitwise_and(mat, maskMat, dst);
射影変換
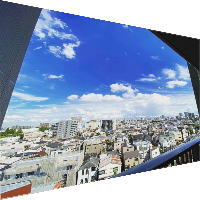
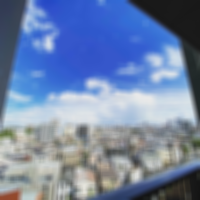
画像に対して射影変換を行う処理です。「射影」と名前がある通り、画像の中の任意の形状を別の形状に変換する処理です。よく見るものとしては紙のドキュメント検出などが挙げられるでしょう。撮影した紙を変形して正面から見たような形に変換するアレです。
using OpenCVForUnity.UnityUtils;
using OpenCVForUnity.ImgprocModule;

private Texture2D _texture;
private double _rightTop = 200.0;
private double _rightBottom = 200.0;

Mat mat = new Mat(_texture.height, _texture.width, CvType.CV_8UC4);
Mat outMat = mat.clone();
Utils.texturew2DToMat(_texture, mat);

Mat srcMat = new Mat(4, 1, CvType.CV_32FC2);
Mat dstMat = new Mat(4, 1, CvType.CV_32FC2);
srcMat.put(0, 0,
    0.0, 0.0,
    mat.cols(), 0.0,
    0.0, mat.rows(),
    mat.cols(), mat.rows());
dstMat.put(0, 0,
    0.0, 0.0,
    mat.cols(), _rightTop,
    0.0, mat.rows(),
    mat.cols(), mat.rows() - _rightBottom);

// 変形用のMatを取得する
Mat transformMat = Imgproc.getPerspectiveTransform(srcMat, dstMat);

// 変形を適用する
Imgproc.warpPerspective(mat, outMat, transformMat, new Size(mat.cols(), mat.rows()));
カラー画像からチャンネルごとの要素を取得する
いわゆるRGBAの各チャンネルごとの要素を別々の Mat に分割する処理です。
using OpenCVForUnity.CoreModule;
using OpenCVForUnity.UnityUtils;
using OpenCVForUnity.ImgprocModule;

private Texture2D _texture;

Mat mat = new Mat(_texture.height, _texture.width, CvType.CV_8UC4);
List<Mat> rgba = new List<Mat>();
Core.split(mat, rgba);
輪郭検出
画像処理などを施したあとに特定領域を調べる、ということはよくあると思います。その際に、輪郭を検出し、その輪郭を表示するというサンプルコードです。キャプチャを見てもらうとどういうことをやっているのか一目瞭然だと思います。
Mat mat = new Mat(_texture.height, _texture.width, CvType.CV_8UC4);
Utils.texture2DToMat(_texture, mat);

// グレースケール化して、
Mat gray = new Mat(_texture.height, _texture.width, CvType.CV_8UC4);
Imgproc.cvtColor(mat, gray, Imgproc.COLOR_RGB2GRAY);

// 画像を2値化したものを利用する
Mat bin = new Mat(_texture.height, _texture.width, CvType.CV_8UC1);

Imgproc.threshold(gray, bin, 0, 255, Imgproc.THRESH_BINARY_INV | Imgproc.THRESH_OTSU);

// 輪郭の抽出
List<MatOfPoint> contours = new List<MatOfPoint>();
Mat hierarchy = new Mat();
Imgproc.findContours(bin, contours, hierarchy, Imgproc.RETR_EXTERNAL, Imgproc.CHAIN_APPROX_SIMPLE);

// 輪郭の表示
for (int i = 0; i < contours.Count; ++i)
{
    Imgproc.drawContours(mat, contours, i, new Scalar(255, 0, 0, 255), 2, 8, hierarchy, 0, new Point());
}
輪郭の近似
上記で検出した輪郭はかなり細かい点が抽出されます。そのため、なにかしらの処理で利用するにはやや細かすぎるため、その輪郭をある程度丸め込んで扱いやすいようにしてくれるのがこの近似です。細かい点については以下の記事が分かりやすかったのでそちらを参照ください。
private void Find4PointContours(Mat image, List<MatOfPoint> contours, Mat hierarchy)
{
    contours.Clear();
    List<MatOfPoint> tmpContours = new List<MatOfPoint>();

    Imgproc.findContours(image, tmpContours, hierarchy, Imgproc.RETR_EXTERNAL, Imgproc.CHAIN_APPROX_SIMPLE);

    foreach (var cnt in tmpContours)
    {
        MatOfInt hull = new MatOfInt();
        Imgproc.convexHull(cnt, hull, false);

        Point[] cntArr = cnt.toArray();
        int[] hullArr = hull.toArray();
        Point[] pts = new Point[hullArr.Length];
        for (int i = 0; i < hullArr.Length; ++i)
        {
            pts[i] = cntArr[hullArr[i]];
        }

        MatOfPoint2f ptsFC2 = new MatOfPoint2f(pts);
        MatOfPoint2f approxFC2 = new MatOfPoint2f();
        MatOfPoint approxSC2 = new MatOfPoint();

        double arcLen = Imgproc.arcLength(ptsFC2, true);
        Imgproc.approxPolyDP(ptsFC2, approxFC2, 0.02 * arcLen, true);
        approxFC2.convertTo(approxSC2, CvType.CV_32S);

        if (approxSC2.size().area() >= 5) continue;

        contours.Add(approxSC2);
    }
}
輪郭検出したエリアをくり抜く
OpenCVでありそうな処理としては、認識したエリアをくり抜く(抽出する)ということがあるでしょう。その際に利用するのが submat メソッドです。さらに便利なことに、前述の輪郭検出で検出した輪郭情報を元に矩形を求めてくれるメソッドもあるので、これを利用することで手軽に該当位置をくり抜くことができます。
using OpenCVForUnity.CoreModule;
using OpenCVForUnity.UnityUtils;
using OpenCVForUnity.ImgprocModule;

Rect rect = Imgproc.boundingRect(contours[0]);
Mat submat = mat.submat(rect);