SRP Batcherが有効なURP向けのシェーダを書く
この記事はUnityアドベントカレンダー2020の5日目の記事です。
概要
以前、URPのScriptableRenderFeatureを使ってブラーをかける方法を解説しました。
edom18.hateblo.jp edom18.hateblo.jp
今回はURP向けのシェーダをどう書くかについて簡単にまとめようと思います。
というのも、以前のビルトインパイプラインのシェーダと異なる部分があり、適切に記述しないとbatchingされないなどの問題があるためです。
ベースにしたのはこちらのUnityのドキュメントに記述されているシェーダです。
抜粋させてもらうと以下のコードになります。
URP用のUnlitなシェーダ
// This shader fills the mesh shape with a color that a user can change using the
// Inspector window on a Material.
Shader "Example/URPUnlitShaderColor"
{
    // The _BaseColor variable is visible in the Material's Inspector, as a field
    // called Base Color. You can use it to select a custom color. This variable
    // has the default value (1, 1, 1, 1).
    Properties
    {
        _BaseColor("Base Color", Color) = (1, 1, 1, 1)
    }

    SubShader
    {
        Tags { "RenderType" = "Opaque" "RenderPipeline" = "UniversalRenderPipeline" }

        Pass
        {
            HLSLPROGRAM
            #pragma vertex vert
            #pragma fragment frag

            #include "Packages/com.unity.render-pipelines.universal/ShaderLibrary/Core.hlsl"

            struct Attributes
            {
                float4 positionOS   : POSITION;
            };

            struct Varyings
            {
                float4 positionHCS  : SV_POSITION;
            };

            // To make the Unity shader SRP Batcher compatible, declare all
            // properties related to a Material in a a single CBUFFER block with
            // the name UnityPerMaterial.
            CBUFFER_START(UnityPerMaterial)
                // The following line declares the _BaseColor variable, so that you
                // can use it in the fragment shader.
                half4 _BaseColor;
            CBUFFER_END

            Varyings vert(Attributes IN)
            {
                Varyings OUT;
                OUT.positionHCS = TransformObjectToHClip(IN.positionOS.xyz);
                return OUT;
            }

            half4 frag() : SV_Target
            {
                // Returning the _BaseColor value.
                return _BaseColor;
            }
            ENDHLSL
        }
    }
}
SRP Batcherを有効にする
SRP Batcherを有効にするためにルールがあるのでそれに従います。具体的には以下。
NOTE: To ensure that the Unity shader is SRP Batcher compatible, declare all Material properties inside a single CBUFFER block with the name UnityPerMaterial. For more information on the SRP Batcher, see the page Scriptable Render Pipeline (SRP) Batcher.
要するに、Propertiesブロック内で宣言した値を利用する場合、CBUFFERブロックで囲まないとダメということです。
ドキュメントのサンプルには以下のように書かれています。
CBUFFER_START(UnityPerMaterial)
    half4 _BaseColor;
CBUFFER_END
逆に言えばこれだけで対応は終了です。
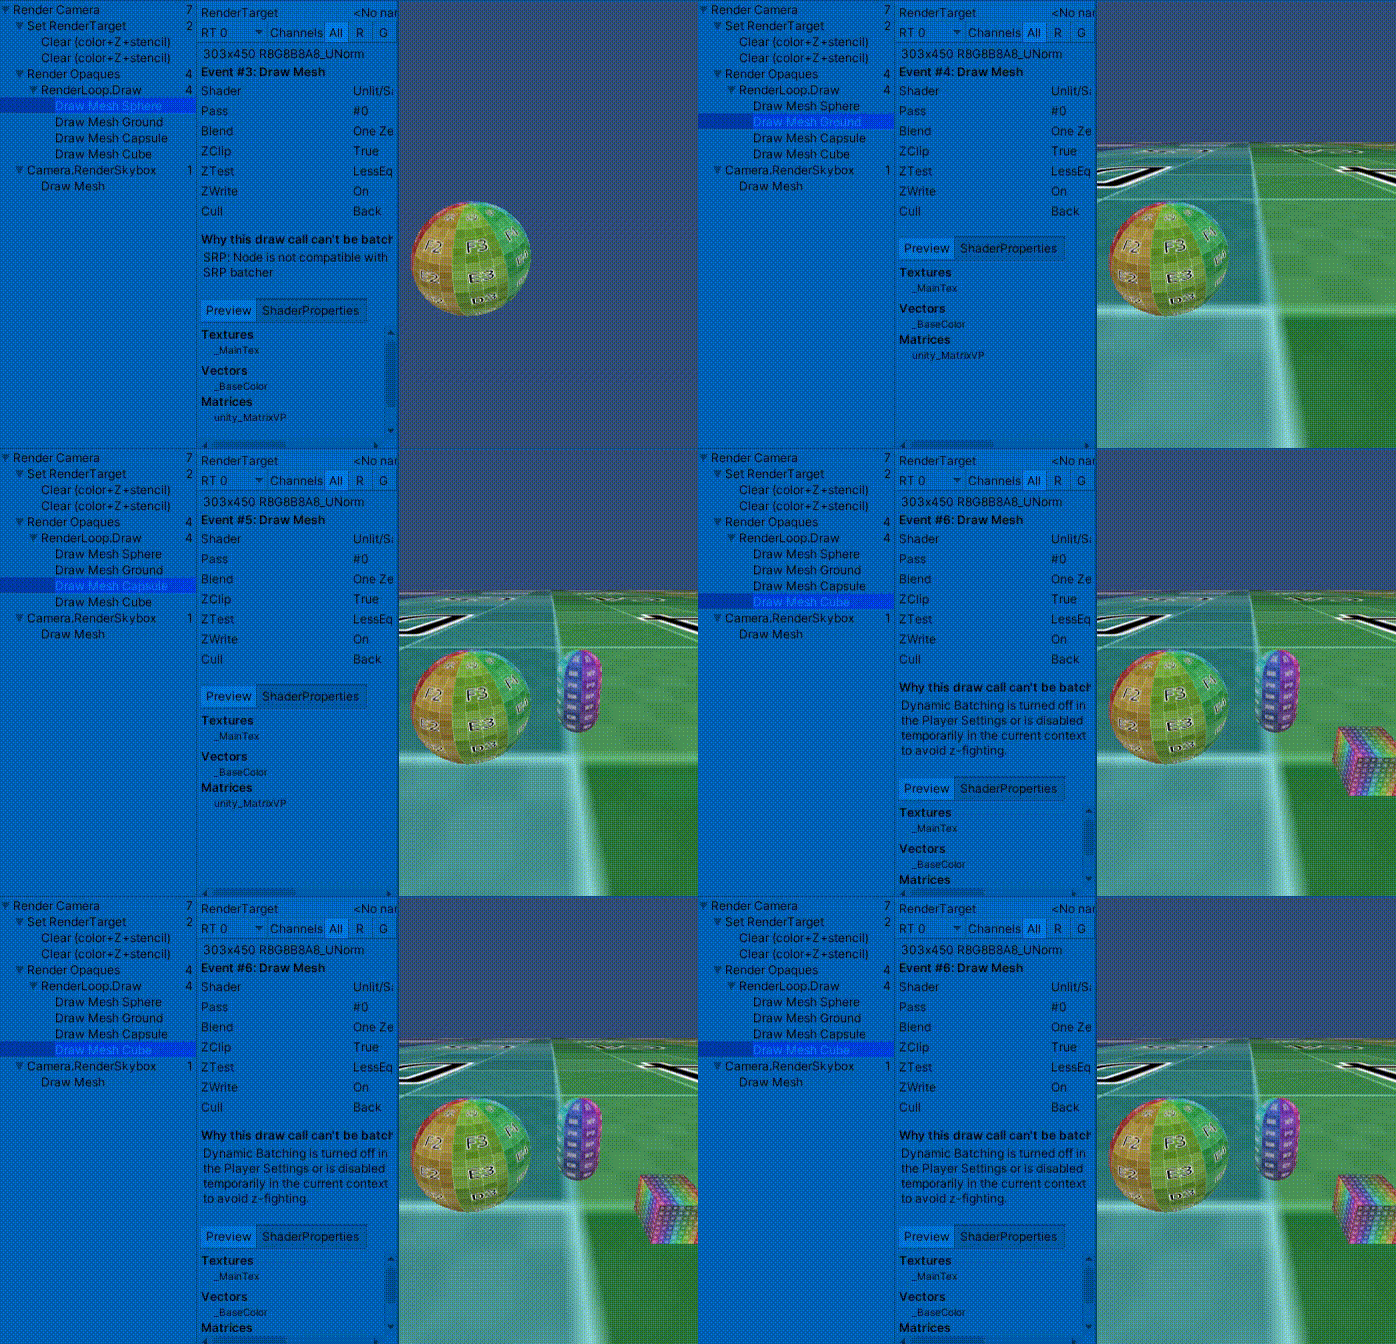
試しに、この対応を入れたものとそうでないものでFrame Debuggerの状態を確認すると以下のように違いが出ます。
まずは対応していないバージョン。

そして対応したバージョン。

後者はSRP Batchと書かれているのが分かるかと思います。
実際のレンダリングにおいても1パスで3つのオブジェクトがレンダリングされていますね。
上記動画で利用したシェーダは以下です。
参考にしたシェーダにテクスチャを追加しただけのシンプルなものです。
Shader "URPSample/URPUnlit"
{
    Properties
    {
        _BaseColor ("Color", Color) = (1, 1, 1, 1)
        _MainTex ("Texture", 2D) = "white" {}
    }
    SubShader
    {
        Tags { "RenderType"="Opaque" "Queue"="Geometry" "RenderPipeline"="UniversalRenderPipeline" }
        LOD 100

        Pass
        {
            HLSLPROGRAM
            #pragma vertex vert
            #pragma fragment frag
            #pragma multi_compile_instancing

            #include "Packages/com.unity.render-pipelines.universal/ShaderLibrary/Core.hlsl"

            struct Attriburtes
            {
                float4 positionOS : POSITION;
                float2 uv : TEXCOORD0;
                UNITY_VERTEX_INPUT_INSTANCE_ID
            };

            struct Varyings
            {
                float4 positionHCS : SV_POSITION;
                float2 uv : TEXCOORD0;
                UNITY_VERTEX_INPUT_INSTANCE_ID
            };

            CBUFFER_START(UnityPerMaterial)
            half4 _BaseColor;
            SAMPLER(_MainTex);
            CBUFFER_END

            Varyings vert(Attriburtes IN)
            {
                Varyings OUT;
                UNITY_SETUP_INSTANCE_ID(IN);
                ZERO_INITIALIZE(Varyings, OUT);
                OUT.positionHCS = TransformObjectToHClip(IN.positionOS.xyz);
                OUT.uv = IN.uv;
                return OUT;
            }

            half4 frag(Varyings IN) : SV_Target
            {
                half4 tex = tex2D(_MainTex, IN.uv);
                return tex * _BaseColor;
            }
            ENDHLSL
        }
    }
}
マクロと関数を覗いてみる
ここからはちょっとした興味の内容になるので、詳細に興味がない人はスルーしても大丈夫です。
今回しようしたシェーダで利用されているマクロや関数がどう展開されるのかを覗き見てみようと思います。
(なお、UNITY_VERTEX_INPUT_INSTANCE_IDについては以前の記事で紹介しているので割愛します)
ZERO_INITIALIZE
まずはZERO_INITIALIZEから。
定義を見ると以下のように記述されています。
#define ZERO_INITIALIZE(type, name) name = (type)0;
めちゃシンプルです。特に説明の必要はないでしょうw
CBUFFER_START / CBUFFER_END
次はCBUFFER_STARTとCBUFFER_ENDです。
定義は以下のようになっています。
#define CBUFFER_START(name) cbuffer name {
#define CBUFFER_END };
展開すると以下の形になります。
cbuffer UnityPerMaterial {
half4 _BaseColor;
SAMPLER(_MainTex);
};
cbuffer name {}で囲うことをマクロにしているとうわけですね。
ちなみにcbufferはconstant bufferの略です。ドキュメントは以下です。
TransformObjectToHClip
最後はTransformObjectToHClipです。こちらはマクロではなく関数になっています。
定義を見ると以下。
// Transforms position from object space to homogenous space
float4 TransformObjectToHClip(float3 positionOS)
{
    // More efficient than computing M*VP matrix product
    return mul(GetWorldToHClipMatrix(), mul(GetObjectToWorldMatrix(), float4(positionOS, 1.0)));
}
さらにマトリクスを取得する関数が書かれていますが、ビルトインパイプラインでシェーダを書いたことがある人であれば見慣れたマトリクス変数を返しているだけのシンプルな関数です。
それぞれは以下のように値を返しています。
// Transform to homogenous clip space
float4x4 GetWorldToHClipMatrix()
{
    return UNITY_MATRIX_VP;
}
// Return the PreTranslated ObjectToWorld Matrix (i.e matrix with _WorldSpaceCameraPos apply to it if we use camera relative rendering)
float4x4 GetObjectToWorldMatrix()
{
    return UNITY_MATRIX_M;
}
シンプルに、頂点に対して座標変換のマトリクスを掛けているだけですね。
まとめ
以上がSRP Batcherを有効にするURPにおけるシンプルなシェーダについてでした。
基本的な書き方や考え方はビルトインパイプラインと大きく変わるものではありません。
なにをどう書いたらいいかさえ分かっていれば、URP向けシェーダを書くのはそれほど大変ではないでしょう。
注意点としては、URPではHLSLを利用するという点です。
いちおうCgも使えるのですが、その場合はどうやら不要なシェーダなどをincludeしてしまうらしく、できれば避けたほうがよさそうです。
みなさんもぜひ良いURPライフを。